A cheap set up for focus-stacked macro imaging
Being able to take high-quality images is an essential tool for documenting and researching insect biodiversity. Most importantly images are used in publications to illustrate the organisms and specific diagnostic structures. Decent-quality images are absolutely necessary for identification in most cases.
Unfortunately, field images or low quality images of mounted specimens (either through a microscope eye piece or a zoomed out cell phone picture) provide insufficient information for accurate identification for the vast majority of ichneumonids. While field photos are great for documenting life history information, especially interactions with other organisms, ichneumonids are far too diverse to be able to be ID'd based on field images alone, where only a few photos (normally from a dorsal angle) can be taken before the wasp quickly flutters away. High-quality images of mounted specimens, however, allow for accurate identifications and also provide much-needed reference images.
Fortunately, a professional-quality imaging system is easily within the reach of anyone that is interested and has about $1,500 to invest. Institutional labs frequently spend tens of thousands on expensive imaging systems that have automated rail systems, specialized lighting, and computers that go along with it. While the bells and whistles are nice, they are far from necessary.
For example, the below setup is what I use for all of my imaging, both for scientific articles and otherwise. It is more or less a typical macrophotography set-up with a DSLR and macro lens, but mounted on a microscope stand and uses focus-stacking software.
The camera body is as Canon Rebel body (~$500 a few years ago) but any DSLR could be used here. The only thing to note is that lower-end cameras like this Rebel have cropped sensors, which means that less area of any given image will be captured compared to a full-frame camera. Luckily, that doesn't really matter since the main problem is with getting higher magnification shots as opposed to not being able to fit a specimen within the field of view.

The next big-ticket item is the macro lens. To have a decent range for both habitus images and higher magnification shots on smaller specimens, you need to have a decent range of 1-5x mangification. If you have the money and a Canon body, it would probably be worth it to spring for the Canon MP-E (~$1,500) which covers the 1-5x range. The cheaper option is to get a lower powered lens for habitus shots and a higher powered lens for closer shots. My set up uses a EF-S 60mm lens (~$300 used) and a Venus Optics Laowa 2.5-5x Ulta-Macro Lens ($400). If an insect is small enough, I can get a full habitus shot with the Laowa lens but more times than not the lower magnification EF-S lens is needed. To avoid having to tediously chance lenses, I usually take a series of habitus images and go back and take a series of closer shots later. Unfortunately, changing out the lens increases the amount of dust that gets caught on the sensor so it needs to be cleaned periodically.


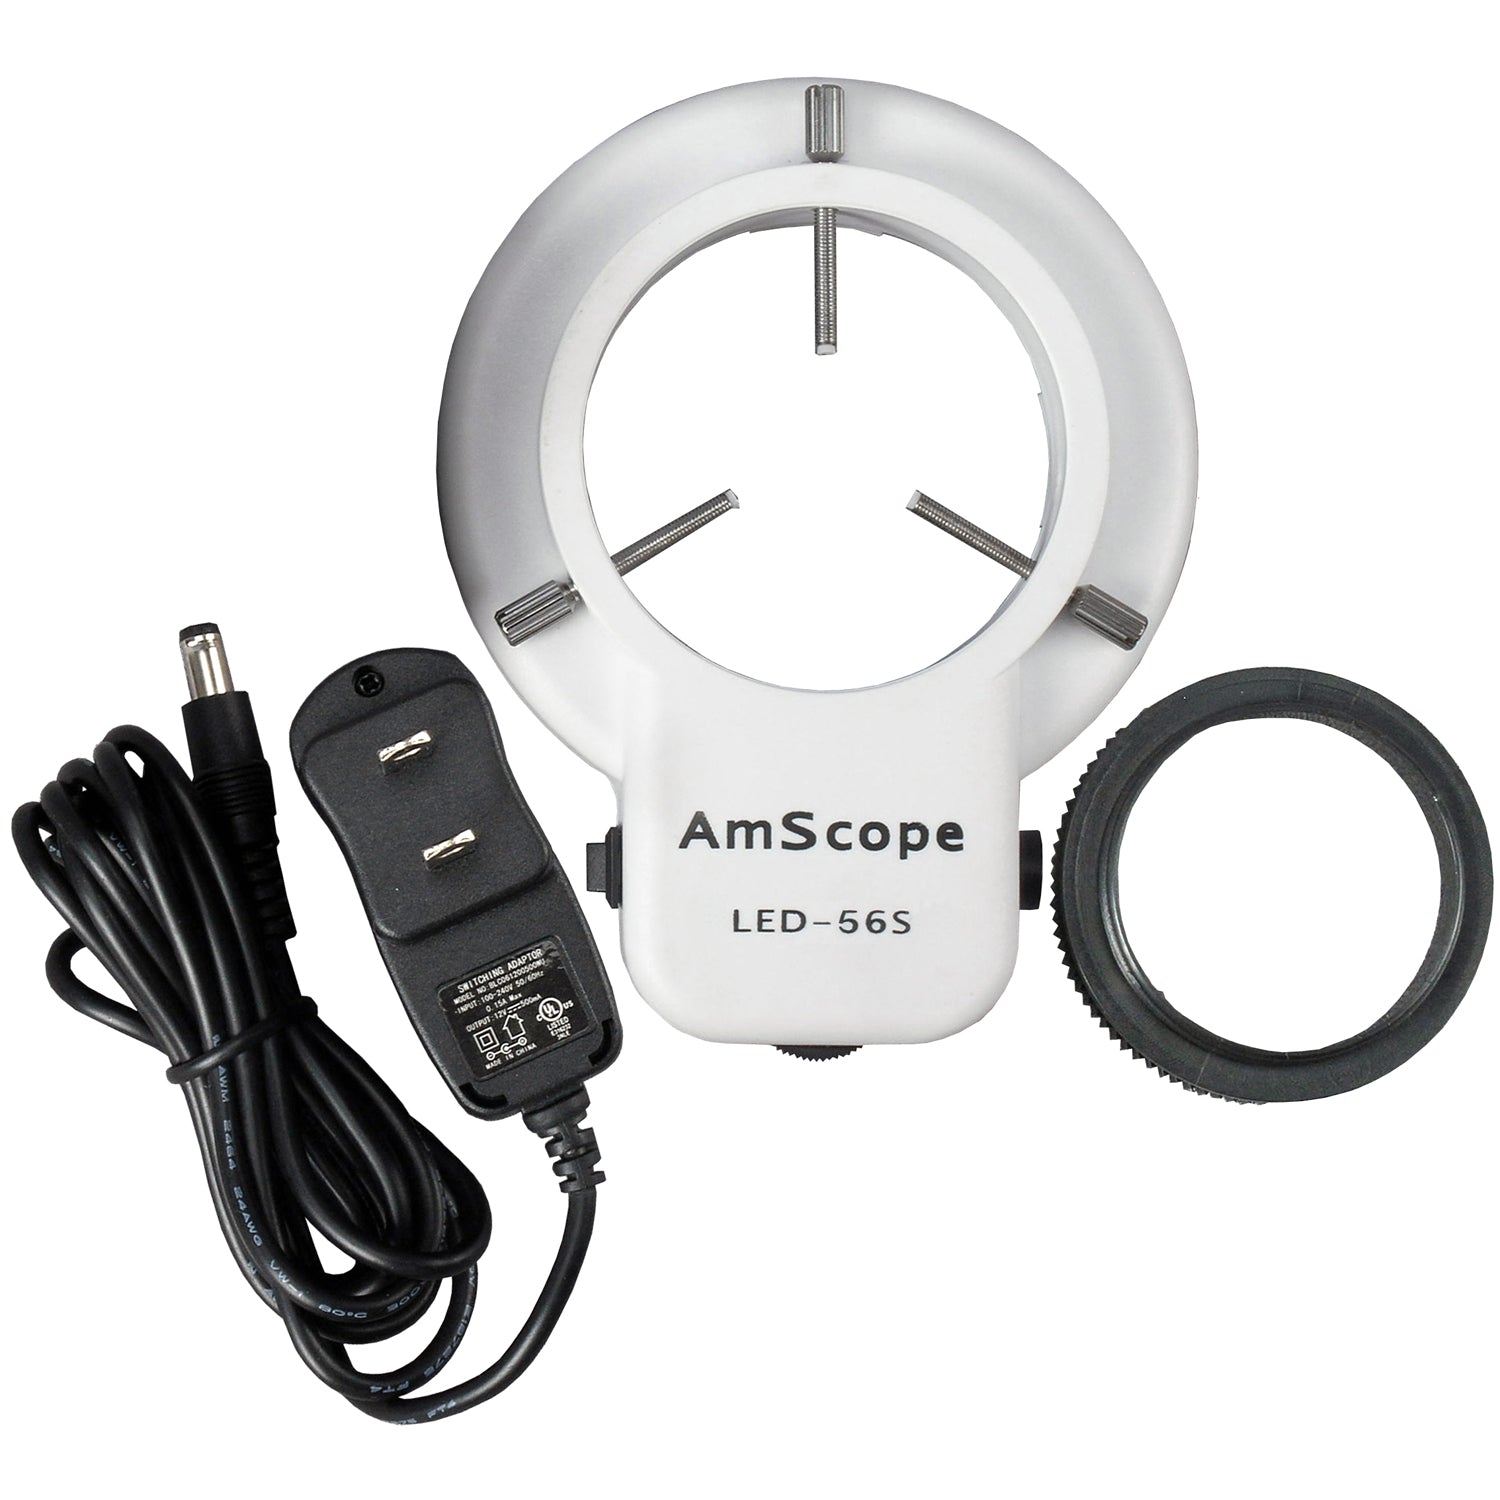
Lighting is a key factor in macrophotography and bright but diffuse lighting is needed to avoid a litany of problems. This can be accomplished with a simple microscope LED ring light that has been modified with styrofoam. This is made by cutting a styrofoam cup at the proper height so that the wider section fits exactly around the circumference of the ring light. The narrower section should be directed at the specimen to focus as much light as possible onto it. Also, glassine paper should be taped over the led lights. Otherwise, the lighting will be much too harsh and "light donuts" will appear on reflective parts of the insect. This lighting set-up is then mounted onto the end of the lens by adjustable screws.
Most professional imaging systems use a dome light, which, as the name suggests, completely covers the specimen in a dome-like structure where the lights are at the bottom and reflect off the interior surface and onto the specimen. These systems are great for achieving extremely diffuse lighting where the light donuts are minimized, but they are expensive and quite tedious to use. When taking a photo you often need to make fine positional adjustments, but with a dome light, you need to crank the camera up and take off the dome light before repositioning. With my suggesting lighting setup, you may be able to manipulate the specimen directly as is, or only need to crank up the camera slightly to get to it.
For positioning specimens, a malleable piece of clay works best. The clay can be subtely adjusted to get the desired angle. The choice of background is largely a matter of taste, though I would suggest using an entirely neutral gray card to be able to keep the white balance and exposure standardized as much as possible.
This entire setup should then be placed on a microscope stand. It is necessary not only to hold everything in place, but also to be able to move the plane of focus very slightly to capture each of the 15-30 images needed to stack together to get the finished product. The large focus knobs allow you to do this by very slightly moving the camera up and down. A suitable microscope stage can be purchased purchased relatively cheaply but you should first check whether or not the pillar is long enough to accommodate a camera and macro lens. Ideally, you would want the stand to be as heavy as possible to be able to buffer the setup against the slight movements that are made when taking the images (increased movement at high magnification and long exposures = blurry images).
Once everything is in place you can now start taking some publication-worthy images! Continue here for details on taking the images and using images stacking software.
